Print cartridges missing or not detected
Try the following solutions to resolve the issue. Solutions are listed in order, with the most
likely solution first. If the first solution does not solve the problem, continue trying the
remaining solutions until the issue is resolved.
•
Solution 1: Remove and reinsert the print cartridges
•
Solution 2: Clean the print cartridge contacts
•
Solution 3: Replace the print cartridges
Solution 1: Remove and reinsert the print cartridges
Solution:
Remove and reinsert the print cartridges and verify that they are fully
inserted and locked in place.
Also, make sure the print cartridges are installed into the correct slots.
To make sure the print cartridges are installed correctly
1.
Make sure the product is turned on.
2.
Open the print cartridge door.
The print carriage moves to the center of the product.
3.
Check to make sure you are using the correct print cartridges for your product.
For more information about compatible print cartridges, see
Order ink supplies
4.
Remove the black print cartridge from the slot on the right. Do not touch the ink
nozzles or the copper-colored contacts. Check for possible damage to the copper-
colored contacts or ink nozzles.
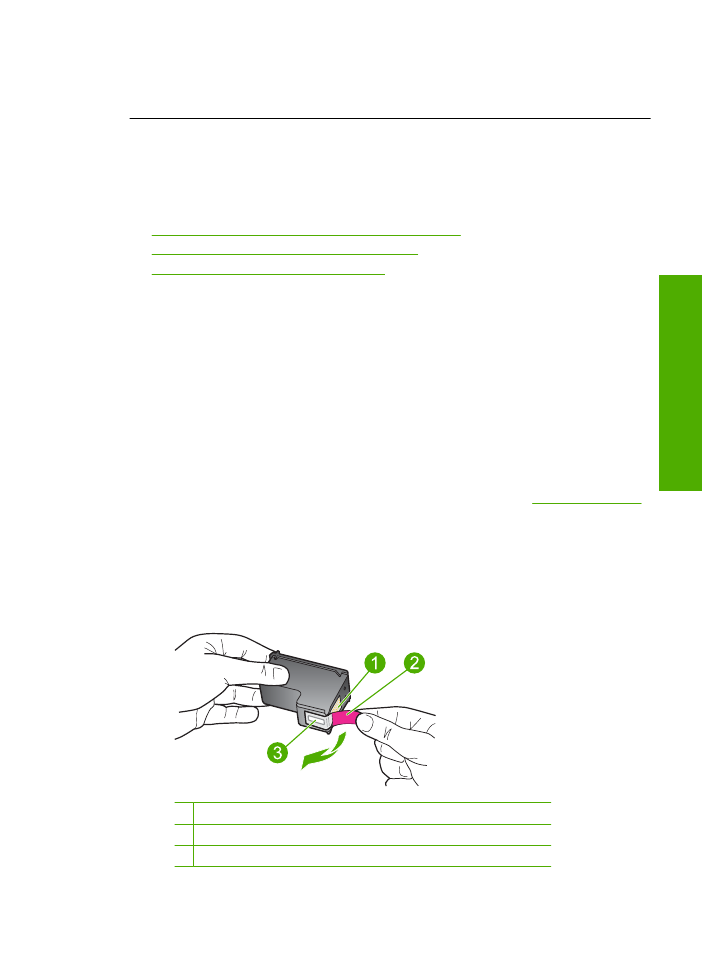
Make sure the clear plastic tape has been removed. If it is still covering the ink
nozzles, gently remove the clear plastic tape by using the pink pull tab. Make sure
you do not remove the copper colored tape containing the electrical contacts.
1 Copper-colored contacts
2 Plastic tape with pink pull tab (must be removed before installing)
3 Ink nozzles under tape
Errors
65
Solve a problem
5.
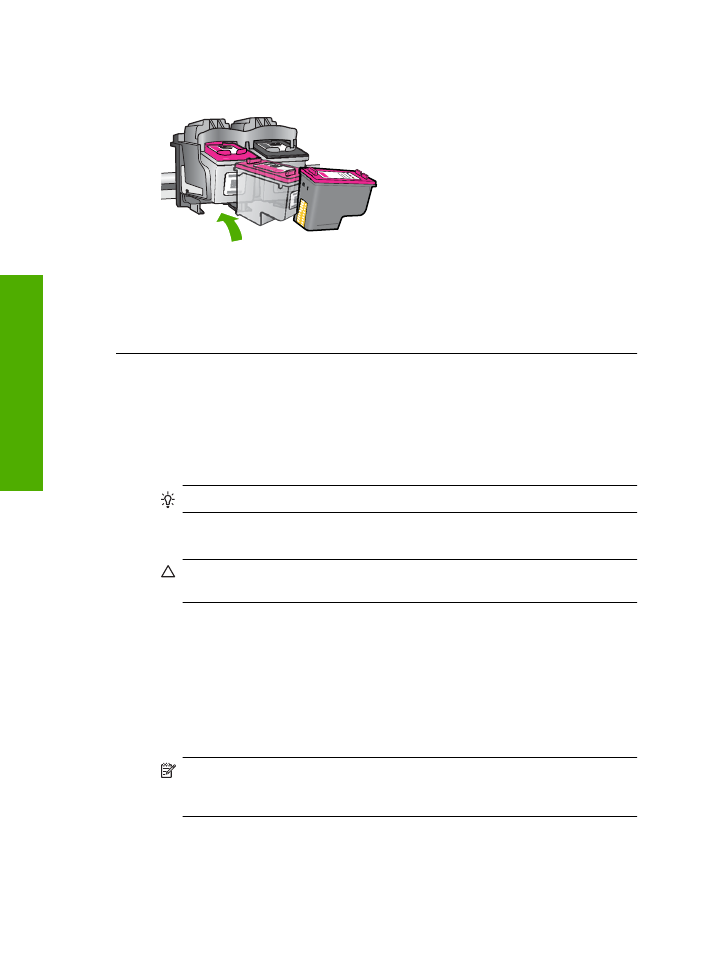
Reinsert the print cartridge by sliding it forward into the slot on the right. Then
push the print cartridge forward until it clicks into the socket.
6.
Repeat steps 1 and 2 for the tri-color print cartridge on the left side.
Cause:
The indicated print cartridges were installed incorrectly.
If this did not solve the issue, try the next solution.
Solution 2: Clean the print cartridge contacts
Solution:
Clean the print cartridge contacts.
Make sure you have the following materials available:
•
Dry foam rubber swabs, lint-free cloth, or any soft material that will not come apart
or leave fibers.
TIP:
Coffee filters are lint-free and work well for cleaning print cartridges.
•
Distilled, filtered, or bottled water (tap water might contain contaminants that can
damage the print cartridges).
CAUTION:
Do
not
use platen cleaners or alcohol to clean the print cartridge
contacts. These can damage the print cartridge or the product.
To clean the print cartridge contacts
1.
Turn on the product and open the print cartridge door.
The print carriage moves to the center of the product.
2.
Wait until the print carriage is idle and silent, and then unplug the power cord from
the back of the product.
3.
Lightly press down on the print cartridge to release it, and then pull it towards you
out of the slot.
NOTE:
Do not remove both print cartridges at the same time. Remove and
clean each print cartridge one at a time. Do not leave a print cartridge outside
the HP Printer for more than 30 minutes.
4.
Inspect the print cartridge contacts for ink and debris buildup.
5.
Dip a clean foam rubber swab or lint-free cloth into distilled water, and squeeze
any excess water from it.
6.
Hold the print cartridge by its sides.
Chapter 5
66
Solve a problem
Solve a problem
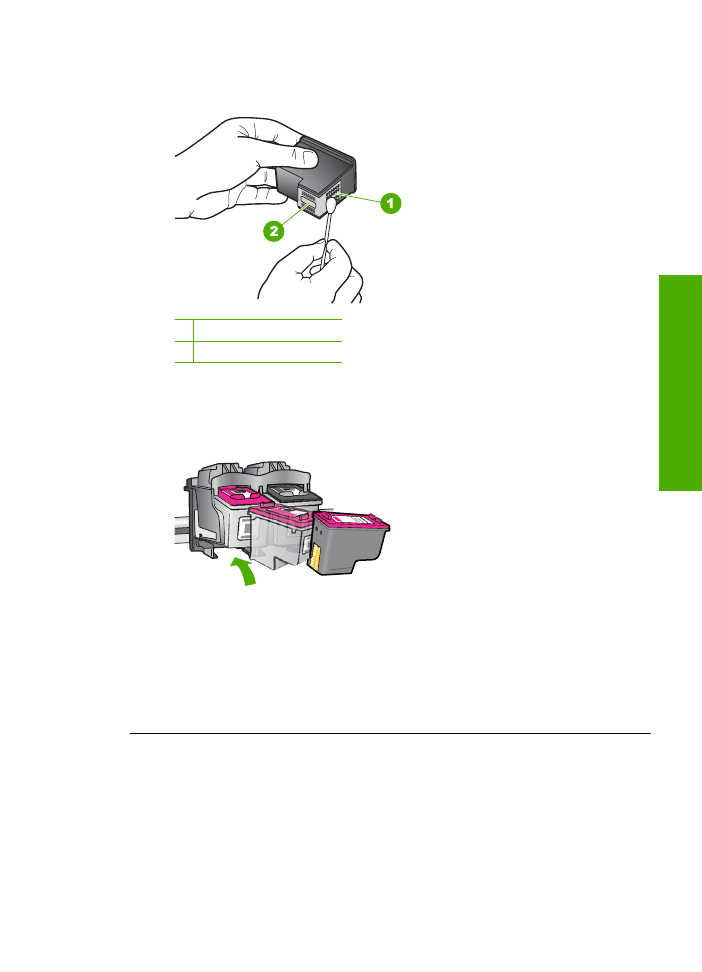
7.
Clean only the copper-colored contacts. Allow the print cartridges to dry for
approximately ten minutes.
1 Copper-colored contacts
2 Ink nozzles (do not clean)
8.
Hold the print cartridge with the HP logo on top, and insert the print cartridge back
into the slot. Make sure you push the print cartridge in firmly until it snaps into
place.
9.
Repeat if necessary for the other print cartridge.
10.
Gently close the print cartridge door and plug the power cord into the back of the
product.
Cause:
The print cartridge contacts needed to be cleaned.
If this did not solve the issue, try the next solution.
Solution 3: Replace the print cartridges
Solution:
Replace the indicated print cartridge. You can also remove the indicated
print cartridge and print using ink-backup mode.
Errors
67
Solve a problem

Check to see if your print cartridge is still under warranty and end of warranty date
has not been reached.
•
If the end of warranty date has been reached, purchase a new print cartridge.
•
If the end of warranty date has not been reached, contact HP support. Go to
www.hp.com/support
. If prompted, choose your country/region, and then click
Contact HP
for information on calling for technical support.
Related topics
Replace the cartridges
Cause:
The print cartridge was damaged.